HOW TO: Identify Driveshaft Components
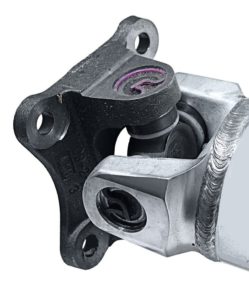
…………………………………………………………………………….
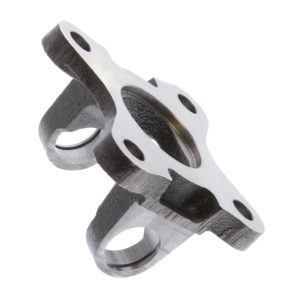
Driveshafts with Flanges
When it comes to flanges in a driveline, there are a few things to consider like sizing, application & fitment.
First, identify what type of flange we are dealing with.
How To Identify Universal Joints
There are many different series of u-joints.
MDL Supplies a wide selection of U-joints for many different applications.
They vary in Series and in Size
If there is a u-joint that we do not stock in our inventory, we can easily order the part for you, along with the rest of your order.
The first thing to identify is whether the U-joint has inside or outside snap rings.
After identifying the configuration of the snap rings, it’s time to get some dimensions.
You will need to find the diameter of one of your u-joint caps.
This applies to both u-joints with inside and outside snap rings.
The next dimension that you need to find, will vary between the two types of u-joint configurations.
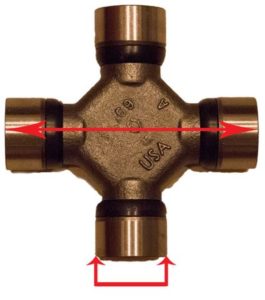
Outside snap rings
For U-joints with outside snap rings, you will need to measure from the edge of one u-joint cap straight across to the edge of the other u-joint cap.
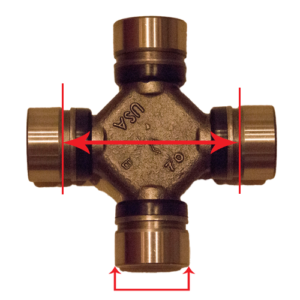
Inside snap rings
For u-joints with inside snap rings, you will see a groove on all the u-joint caps.
You will need to measure from the outside edge of one snap ring groove straight across to the outside edge of the other snap ring groove.
With these dimensions, it will be easy to identify what series of U-joints you have.
Another way to identify a u-joint is by properly measuring the pinion yoke.
The diagrams below will show you which measurements to take to do so.
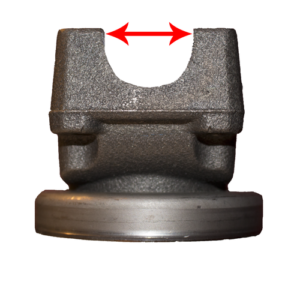
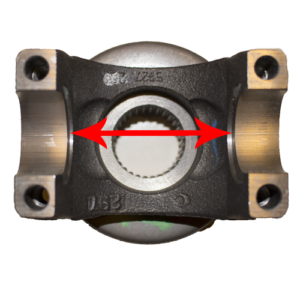
SIDE VIEW OF INSIDE SNAP RING YOKE TOP VIEW OF PINION YOKE
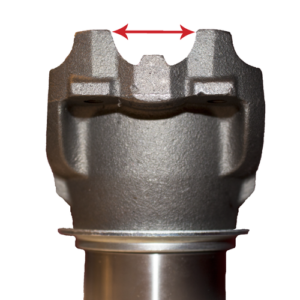
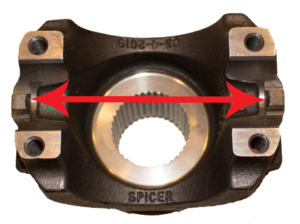
SIDE VIEW OF PINION YOKE WITH TABS TOP VIEW OF PINION YOKE WITH TABS
| OUTSIDE SNAP RING | ||
| SERIES | WIDTH (F) | CAP DAIMETER (G) |
| 1310 | 3 7/32” = 3.219 | 1 1/16” = 1.063 / 1.125 |
| 1330 | 3 5/8” = 3.625 | 1 1/16” = 1.063 |
| 1350 | 3 5/8” = 3.625 | 1 3/16” = 1.188 |
| INSIDE SNAP RING | ||
| SERIES | WIDTH (F) | CAP DAIMETER (G) |
| 1310 | 3 7/32” = 3.219 | 1 1/16” = 1.063 / 1.125 |
| 1330 | 3 5/8” = 3.625 | 1 1/16” = 1.063 |
| 1350 | 3 5/8” = 3.625 | 1 3/16” = 1.188 |
Do you have a Male or Female Flange?
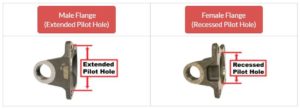
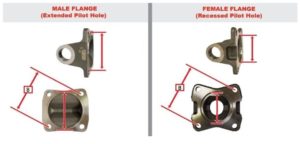
- It is important to know are the Holes Threaded or just drilled ?
- Is the hole pattern Square or Rectangular ?
Other helpful information is outlined below.
-
Measure Dimension ‘A’ from Diagram below
-
Repeat this step for dimension ‘B’
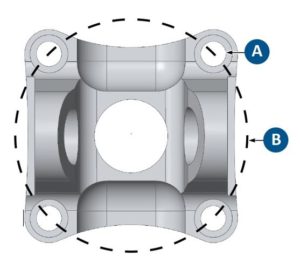
A. Bolt Hole Diameter
B. Bolt Circle Diameter
Register Diameter – SB 2”
Standard 4-bolt flanges
Bolt Circle Diameter Pilot UJ Series
4.25 Sq F 2.0 1310
4.25 Sq F 2.0 1330
3.5 Sq F 2.0 1310
3.5 Sq F 2.0 1330
3.125 Rec M 2.375 1310
6 and 8-bolt flanges
Bolt Circle Bolt Diameter UJ Series
3.7 x 6 .425 1350
3.47 x 8 .425 1350
4.33 x 6 .500 1350
Pilot Choices: 2.0, 2.375, 2.685, 2.75, 2.94
Bolt Circle Dia: 2.75, 3.5, 4.25, 4.75

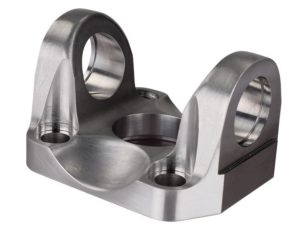
…………………………Pinion Companion Flange Example
Please log in to leave a comment.
No Comments Yet