HOW TO: Properly Align & Index your Bellhousing
Prevent Unnecessary Wear, Tear, and Power Loss with thoughtful installation
Here’s something most home garage enthusiasts never think about — proper bellhousing alignment and indexing. Admit it — have you ever performed a bellhousing alignment? Very few of us have or know anything about this subject. We address this issue at Modern Driveline because we want you to be able to maximize service life and performance from our products.
Because engines, bellhousings, transmission cases and other related parts are mass produced they’re imperfect components by design and execution. They’re not all manufactured to exact specifications. There’s core shift in castings. Tooling wears out. Factory workers have bad days and get careless. And tolerances can slip. What’s more, figure in rebuilds, line-boring/honing, overheats, and even normal operation (heat cycling and other stresses) will change casting dimensions.
When you add up all the variables in manufacturing you can wind up with an engine, crankshaft, bellhousing, and transmission out of alignment to where there are excessive side loads and a poor clutch to flywheel alignment. The result becomes poor power transfer (due to friction and side loading) and excessive wear, and poor shiftability. Clutches and transmissions that wear out prematurely aren’t just a fluke. There’s a physical reason for every failure. Let’s talk about that.
Engine block, bellhousing, flywheel, clutch, and transmission input shaft must all be in perfect alignment for optimum performance. If any of it is out of alignment, which is common; wear, tear, and performance go off the rails. To ensure everything lines up, begin your fact-finding mission with a dial indicator. Dial indicators are reasonably priced at places like Harbor Freight and are a must for every tool box. Make sure your shop is appropriately equipped.
Dialing In Bell Alignment
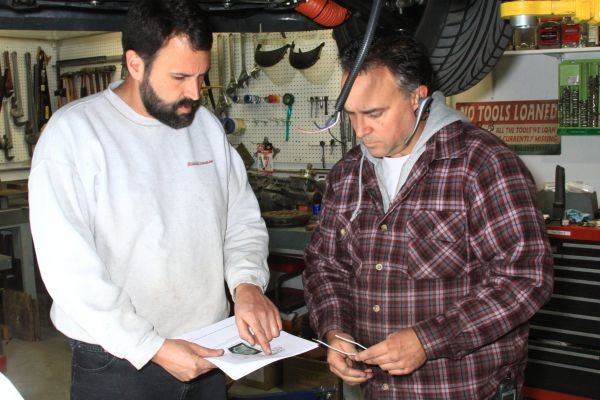
First, always perform bell alignment with the block plate installed and flywheel installed and torqued to proper specifications. Clutch does not have to be installed for this procedure — only the flywheel you’re going to use. You must have perfectly clean contact surfaces. No paint or any debris. There cannot be any imperfections in contact surfaces such as scratches or gouges. Believe it or not, these flaws will alter your measurements no matter how small.
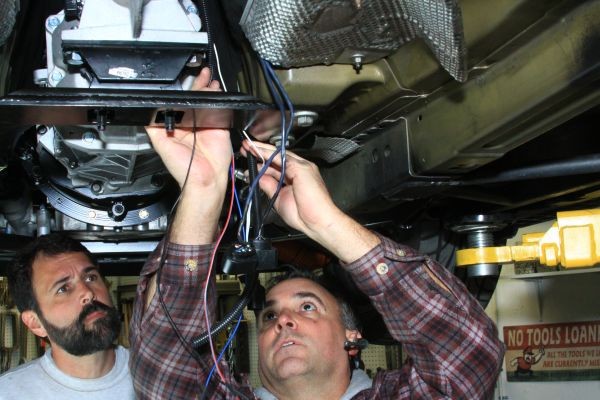
The dial indicator is mounted on the flywheel as shown. You steadily rotate for 360-degrees around the inside of the bell-to-transmission inside diameter. Zero your dial indicator where it just touches the bell’s inside diameter and slowly rotate the crank. As you turn the crank slowly observe the needle. You will be amazed at how much needle movement occurs.
As you make your way around the circumference for a complete 360 degrees, look for needle movement outside of proper limits. This really is about diameter, not radius, where you take the 0.010-inch figure and divide it in half to achieve the correction number. Needle movement must be less than 0.010-inch. Anything outside of 0.010-inch calls for the use of offset dowel pins, which get the bellhousing within proper limits as it relates to the flywheel and transmission. Offset dowel pins are generally available in 0.007-, 0.014, and 0.021-inch sizes. Look at how much misalignment you have, then, determine which offset dowel pin you’re going to need to get alignment inside the 0.010-inch limit window.
 Fig. 1: Set up your dial indicator with the pin just touching the inside diameter of the bell to transmission front bearing retainer opening. Zero the dial indicator.
 Fig. 2: Turn the flywheel/crank slowly for 360 degrees and closely watch the needle. Needle movement should be 0.010-inch or under. It’s a good idea to repeat this procedure to see if the gauge repeats the numbers. If there’s any doubt do this again until you are positive of your findings.
 Fig. 3 Record misalignment numbers, if any, and order the offset block pins you’re going to need to get your bell centered.
Enthusiasts Who Are Also EngineersThis is why you do business with Modern Driveline. We are not a large company with huge product development teams with bean counters and Wall Street investors looking over our shoulders. We are automotive enthusiasts bent on getting our products right before they’re ever sold to the public. We are also very determined to deliver great technical support after the sale. As a Modern Driveline customer, you will never be our guinea pig. We find problems before they get to you and solve them before they ever become a headache for you.
We don’t just find the fault — we find the fix at the prototype phase before products ever reach the mass production phase. And if you ever encounter a problem with any of our products, we invite your contact so we may solve it before it ever becomes a frustration for you. If there is a problem after the sale, we are here to provide lifetime technical support for any Modern Driveline product you buy.
If you’re looking for more information or a quote for your project send us your details and we’ll get back to you with a quote. Or call… 208-453-9800
|

Please log in to leave a comment.
No Comments Yet